If you need to run Mariner Advancement on your Mac, the most seamless solution is using a tool called Parallels Desktop (Available here).
Parallels is a program that creates a "computer within your computer." It allows you to install and run the Windows operating system directly alongside macOS. Because Windows runs inside this virtual environment, you can launch Mariner Advancement and interact with it right next to your standard Mac apps, giving you the exact same study experience as a dedicated Windows PC.
Because Mariner Advancement runs from a USB flash drive, Windows needs direct access to that drive. Your Mac and your Windows virtual machine cannot share the drive at the same time. If the drive opens on the Mac side and is simply "shared" with Windows, the MA program will not run correctly.
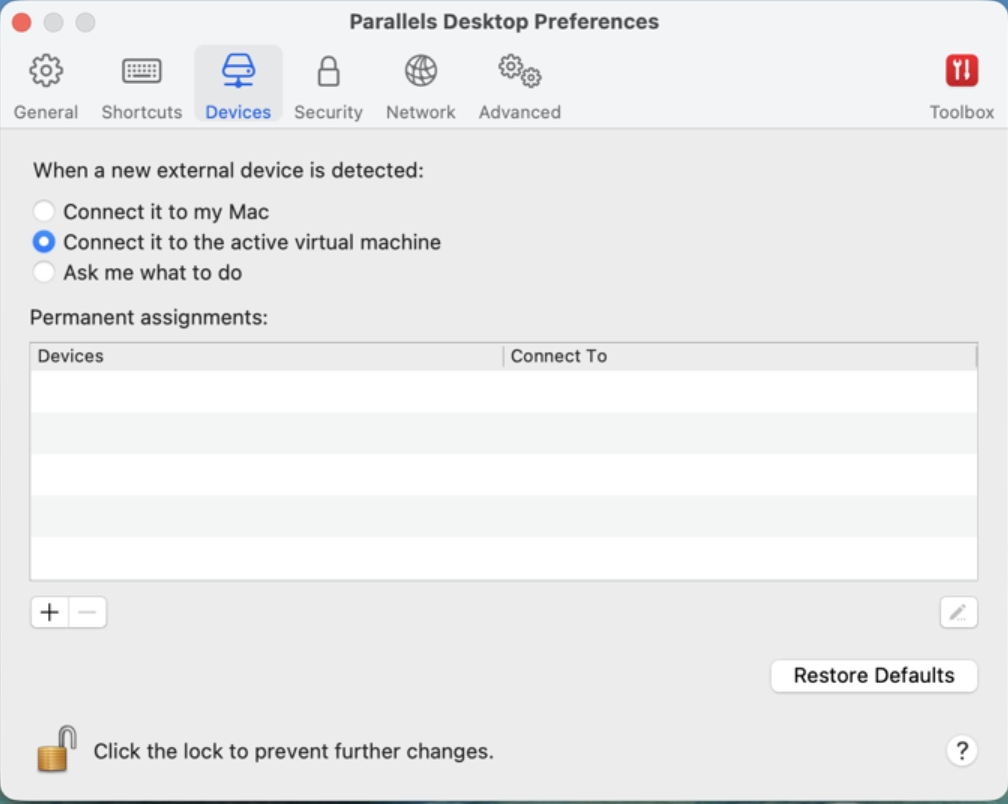
1. During Initial Setup When you first plug in your flash drive while running Windows, Parallels will usually display a prompt asking what to do with the new device (flash drive). Select the radio button to Connect it to the active virtual machine (or "Windows")
You can easily check if your flash drive is connected properly by opening File Explorer inside Windows:
Correct: The drive shows up with a dedicated Windows drive letter (e.g., D: or E:). This means Windows has full control.
Incorrect: The drive shows up with (Mac) next to the name. This means the Mac still controls the drive, and the setting needs to be changed..
If your drive is showing up with "(Mac)" next to it, you can force the connection over to Windows in your Parallels Preferences:
Open Parallels Preferences: Right-click the Parallels Desktop icon in your Mac Dock and select Preferences (or click the Parallels logo in the top macOS menu bar and choose Preferences).
Navigate to Devices: Click on the Devices tab, and then select USB & Bluetooth from the sidebar.
Change the default connection: Look for the section that dictates what happens when a new device is plugged in. Change the setting so that your specific flash drive (or all USB drives) automatically connects to Windows instead of your Mac by selecting: Connect it to the active virtual machine. See screen shot below:
Reconnect the drive: Unplug the Mariner Advancement flash drive from your Mac, wait a few seconds, and plug it back in. It should now mount directly in Windows with its own drive letter. If you need assistance, feel free to give me a call.